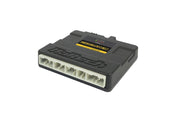
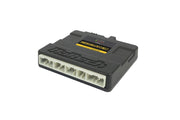
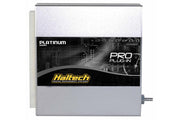
What this ECU is, and who it's for
Honda's K-series cars respond really well to tuning, but the factory ECU was never designed for boost, flex fuel or a proper wideband. Haltech's Nexus Plug-in ECU for these chassis solves that by plugging into the original ECU connectors. Your factory engine harness stays exactly as it is, and you get a modern Nexus processor, NSP software, onboard wideband control and room to add sensors through a dedicated auxiliary connector.
It suits a daily-driven RSX that just wants a clean intake and header tune, and it scales up to a turbo K24 running ethanol. The hardware is the same either way. What changes is how much you plug into the auxiliary port.
Which version fits your car
There are two part numbers, split by model year rather than by body style. Pick by the year of your chassis:
| ECU | Fits | Transmission |
|---|---|---|
| Nexus Plug-in ECU - Honda EP3 (HT-231001) | Civic EP3 (2001-2005) and Integra / Acura RSX DC5 (2002-2004) | Manual only |
| Nexus Plug-in ECU - Honda DC5 (HT-231011) | Integra / Acura RSX DC5 (2005-2006) | Manual only |
Automatic cars aren't supported by either unit. A K24A swap into one of these chassis is supported, but only if you keep the car's original engine harness so the ECU pin assignments still line up.
What you get in the kit
- The Nexus Honda Plug-in ECU itself
- An 8 ft (2.5 m) expansion harness with an air temperature plug and a wideband plug
- A Haltech air temperature sensor (1/8 NPT) plus an aluminum weld-on bung for it
- Mounting brackets and hardware: three brackets for the EP3 unit (HT-039408, HT-039409, HT-039410), two for the DC5 unit (HT-039409, HT-039410)
- 8 ft (2.5 m) of vacuum hose and a T-piece for the onboard MAP sensor
- A Haltech USB-C cable and a quick start guide
What's not included is the wideband sensor. Budget for an LSU 4.9 wideband hardware pack or an NTK wideband hardware pack, because the factory 4-wire air/fuel sensor can't be used with this ECU.
Getting connected in NSP
Nexus ECUs are tuned in Haltech NSP. Install it from the Haltech software downloads, then plug the USB-C cable into the port on the front of the ECU. You don't need the ECU in the car for this step, and that's deliberate: over USB alone the ECU wakes in a low power mode with its inputs and outputs switched off. That lets you load a base map, or build one in the wizard, on the bench before the unit ever sees the car's wiring.
Wi-Fi
Once it's configured, you can ditch the cable. Turn on the Wi-Fi module under Connections in the navigation tree, then set an SSID (at least 1 character) and a password (at least 8 characters) under the Wi-Fi item and hit Apply. With the key on, the ECU broadcasts that network and your laptop joins it like any other. A few things we tell every customer:
- The antenna is inside the case, and Wi-Fi only runs when the ECU has main power from the ignition, not USB power.
- Up to two laptops can connect over Wi-Fi at once, plus one on USB-C.
- Disabling the module turns the radio fully off, not just hidden.
More detail is in our Nexus Wi-Fi article. There's also the free Haltech Connect app for Android and iOS, which is handy for checking live data, setting up simple gauges, clearing codes, assigning wiring and changing a limited set of parameters from your phone.
The setup wizard, step by step
With a plug-in Nexus, the NSP wizard does most of the base configuration for you. In order, it asks you to:
- Name the vehicle. NSP makes a folder for it on your laptop where maps and logs are saved. Add a description too; it makes it much easier to tell map versions apart later.
- Choose the vehicle and engine from the models this ECU supports.
- Set application options, like injectors and ignition.
- Pick the auxiliary harness you're using, so NSP can assign inputs and outputs for the wideband, pressure sensors, flex fuel and so on.
- Review the summary and change anything that's wrong before you finish.
The wizard builds something that should start and idle. It is not tuned for your injectors, cams, fuel or boost. Run it gently, confirm fuel and timing, then get it properly tuned before you lean on it. If you'd like us to do that, book a free consultation.
Car-specific notes we check on every install
| Item | How this ECU handles it | Our advice |
|---|---|---|
| Air temp sensor | Use the factory sensor or the Haltech one in the kit | On boosted cars, fit the Haltech sensor after the intercooler using the weld-on bung |
| MAP sensor | Factory MAP works, or use the ECU's onboard 4 bar sensor | For boost, use the onboard sensor, and run the supplied hose to a real manifold vacuum source or it reads nothing |
| Wideband O2 | Factory 4-wire sensor not supported; Bosch LSU 4.9 or NTK only, through the aux connector | Mount it in the top half of the pipe so condensation can't pool on the element |
| Forced induction | Supported using spare outputs on the aux connector (boost control and the like) | Plan your aux pin use before you start crimping |
| Flex fuel | Wire the sensor to an SPI on the aux connector | The flex fuel composition sensor lets the tune follow ethanol content |
| Multiplex Control Unit | The ECU speaks the OEM MCU signals: coolant temp display, battery light and A/C request | Confirm the gauge and A/C work on the first drive |
| Immobilizer | Bypassed whatever its state, and the dash light is cleared at startup | No need to reprogram keys |
The 26-pin auxiliary connector
Everything the car didn't have from the factory goes through the 26-pin aux connector. The included expansion harness (HT-189000) clips into it and routes into the engine bay with the air temp plug, a wideband plug run by the ECU's internal wideband controller, and loose pins for anything else: fuel and oil pressure sensors, a flex sensor, or a digital output for boost control. You assign those extra functions in NSP.
Adding a pin is simple: release the bottom locking tabs, push the terminal in from the wire side, then close the top tabs to lock it. Pull gently on the wire afterward to make sure it clicked home.
The switched 12V pins on the CAN connector and aux connector share a combined limit of 8 A across all three pins. Anything hungry, like a fuel pump or fans, belongs on a relay. Our relay guide explains why.
Optional expansion harnesses
If you'd rather not build your own, Haltech sells two plug-in harnesses for the aux port (sold separately):
- HT-189002 IO Expansion Harness, 8 ft (2.5 m): ready-made plugs for wideband, flex fuel, oil pressure, fuel pressure and air temperature, plus spare pins for extra outputs.
- HT-189003 DBW Expansion Harness, 8 ft (2.5 m): everything the IO harness has, plus a Bosch drive-by-wire throttle plug and a universal accelerator pedal plug you can wire to the pedal of your choice.
Where the ECU mounts
- Civic EP3: the factory ECU is behind the glove box. Take the glove box out, swap the unit using the supplied brackets on the factory bolt locations, and put the glove box back once the wizard setup is done.
- Integra / RSX DC5 (both year ranges): the factory ECU sits under the glove box area, close to the blower motor. Remove the under-dash panel to reach it, fit the Nexus with the brackets on the original mounting points, then refit the panel after setup.
Adding CAN devices
An onboard CAN connector lets you add Haltech CAN products directly. To run several at once, link them with Haltech CAN cables and a CAN hub. Popular additions are a Haltech display dash, a CAN keypad for switching maps or functions, and a Nexus IO16 when you run out of inputs and outputs. The same shared 8 A switched 12V limit applies here.
Troubleshooting
| Symptom | Usually |
|---|---|
| MAP reads atmospheric all the time | Onboard MAP selected but the vacuum hose isn't connected to the manifold |
| Can't find the ECU's Wi-Fi network | Wi-Fi module not enabled, or the ECU only has USB power and no ignition |
| Coolant gauge or A/C not working | Check the vehicle selection in the wizard matches your exact car |
| No wideband reading | Factory sensor still fitted; it isn't supported, fit an LSU 4.9 or NTK |
| Swapped K24 runs badly or not at all | Engine harness changed from the chassis original, so pin assignments don't match |
FAQ
Will this work on my automatic RSX?
No. Both versions are manual-transmission only.
Can I keep my K-swap?
A K24A swap is supported as long as you use the vehicle's original engine harness. Aftermarket or adapted harnesses may not match the pinout the ECU expects.
Do I have to buy a separate wideband controller?
No. The controller is built into the ECU; you only need the sensor hardware pack. Browse the rest of the range in our Haltech Nexus collection, or see the RX-8 and GM Delco plug-in guides for comparison.