What this ECU is, and who it's for
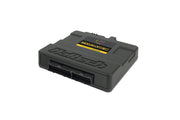
The Nexus Plug-in ECU GM Delco (HT-230801) is a direct replacement for the Delco engine computer used in a specific run of Australian-market Holden Commodores. It connects to the factory harness plugs, so the install is mostly unbolting one box and bolting in another. Once it's in, you're tuning in NSP with the full Nexus feature set: onboard wideband control, Wi-Fi, CAN expansion and extra auxiliary I/O for the upgrades that usually come next.
Because it's built around the factory wiring, fitment is model-specific. Check the list below before you buy. If your car is a US-market GM with a Delco computer, don't assume it's covered. Ask us first.
Supported vehicles
| Model | Engine and ignition | Transmission support |
|---|---|---|
| Holden Commodore VN to VP | V6 with DFI module | Automatic and manual |
| Holden Commodore VN to VP | V8 with distributor | Automatic and manual |
| Holden Commodore VR to VS | V8 with distributor | Manual only. VS Series III is not supported |
| Holden Commodore VR | V6 with DFI module | Manual only |
Two platform limits matter as much as the model list. The ECU supports cable throttle bodies only, not drive-by-wire. And it only drives distributor ignition or DFI-module coil packs. If your car has been converted to individual coils or electronic throttle, talk to us about a different Nexus option.
In the box, and what you might add
The kit includes the ECU, a short expansion harness for air temperature and wideband, a 1/8 NPT air temperature sensor with an aluminum weld-on bung, mounting brackets and hardware, 2.5 m of vacuum hose with a T-piece, a USB-C cable and a printed quick start guide.
Two accessories are sold separately and are worth planning for from day one:
- IO Expansion Harness 2.5 m (8 ft), HT-189002: pre-terminated plugs for a wideband hardware pack, flex fuel sensor, oil pressure, fuel pressure and air temperature, plus spare pins for outputs on the 26-pin connector.
- LSU 4.9 Wideband Hardware Pack, HT-010746: the wideband sensor hardware that plugs into the onboard wideband controller. You'll want this for tuning and for closed loop fueling.
Before it goes in the car: NSP and the first connection
- Download and install NSP from the downloads section, then launch it from the Start menu or the desktop shortcut.
- Plug the USB-C cable into the front of the ECU with NSP open. NSP recognizes the ECU and wakes it in low-power mode.
- Run the setup wizard on the bench.
Low-power mode is the reason we always configure these on the workbench. The inputs and outputs are held off, so nothing fires while you choose injectors and ignition settings. Only once the wizard is done, or a known-good map has been loaded, should the ECU see power from the car.
What the setup wizard asks for
- Vehicle name and description: NSP creates a folder on your laptop with this name for maps and logs. A good description saves confusion when you have several versions of a tune.
- Vehicle and engine: pick from the models this ECU supports.
- Application options: injectors, ignition system and similar hardware choices.
- Auxiliary harness: tell it which harness you're using so it can assign I/O for the wideband, pressure sensors, flex fuel and so on.
- Summary: a review page where you can go back and change anything before it builds the base map.
The wizard gives you something that should start and idle. It is not tuned for your engine. Treat it as a starting point, verify fuel pressure, timing and wideband readings before you load the engine, and plan on proper tuning. Haltech won't cover damage from running a base map as-is, and neither will we.
Wi-Fi and the Haltech Connect app
Once it's set up, you don't have to be tethered by USB. To turn on wireless:
- Connect over USB-C with NSP open.
- In the navigation tree, open Connections and enable the Wireless module.
- Under Connections, choose Wireless, enter an SSID (one character minimum) and a password (eight characters minimum), then click Apply.
- Switch the ignition on so the ECU is on main power, then join that network from your laptop's network settings.
A few things to know. The antenna is inside the case, so there's nothing to mount. Wireless only works on main power, not USB power. Up to two computers can connect over Wi-Fi alongside one on USB-C. When you disable the module, it's fully off rather than sleeping. See our Wi-Fi article for more detail.
The free Haltech Connect app for iOS and Android uses the same wireless link. From a phone or tablet you can watch live data, build simple gauge pages, clear DTCs, assign wiring and change selected settings. It's handy for quick checks without opening the laptop.
Application notes we check on every install
MAP sensor and vacuum
If the car has a mass airflow meter, the Nexus ignores it. The ECU uses its internal 4-bar MAP sensor, which needs a vacuum source from the intake manifold. Use the supplied hose to reach a spare manifold port, or put the T-piece into the fuel pressure regulator's vacuum line. On cars that came with a 1-bar MAP sensor, the onboard 4-bar sensor takes over and gives you room for boost.
Air temperature
You can keep the factory air temperature sensor or fit the Haltech one from the kit. On MAF cars the factory sensor lives in the airflow meter, which is why the kit includes a sensor and weld-on bung. We usually prefer a dedicated sensor in the intake pipe after any intercooler.
Wideband
For tuning and closed loop O2 control, connect a Bosch LSU 4.9 or NTK sensor through the auxiliary connector. The wideband controller is inside the ECU, so there's no separate controller box to wire.
Forced induction
Boost control and similar functions run from spare outputs on the auxiliary connector, so a turbo or supercharger conversion doesn't need a different ECU.
DFI modules and ignition bypass
The DFI module is unusual. While the engine is cranking it can fire the coils on its own, triggered by the edges of the crank sensor signal, with no timing command from the ECU. That's why cranking timing may not follow your map until the engine starts and the ECU takes control. Keep it in mind when you're checking base timing with a light.
The 26-pin auxiliary connector
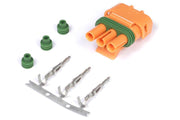
This connector is where you add anything the factory car didn't have. The included expansion harness (HT-189000) plugs into it and gives you an air temperature connector, a wideband plug for the onboard controller, and spare pins for items such as fuel pressure, oil pressure, flex fuel or DPO outputs like boost control, all assigned in NSP.
Adding a pin to the connector:
- Release the lock by pushing the lower tabs.
- Insert the terminal from the wire side.
- Push the upper tabs to lock it back in.
The switched 12V pins on the CAN and auxiliary connectors share a combined 8 A across three pins. Add up everything you're powering from them. Larger loads belong on their own relay.
The pinout for this connector is a diagram in Haltech's guide. Need this diagram? Ask us and we'll send it over with advice for your build.
Mounting the ECU
The factory computer sits behind the passenger-side kick panel. Remove the kick panel trim, swap the units and refit the trim. The Nexus is compact enough that the cover goes back on. The supplied bracket and screws are made for the Australian domestic models this ECU supports, so on anything else you may need your own mounting solution.
Expanding over CAN
An onboard CAN connector lets you add Haltech devices without touching the factory harness. Link several together with Haltech CAN cables and a CAN hub. Popular additions are the uC-10 display dash, a CAN keypad for switching dash screens or triggering functions, and the Nexus IO16 when you need more inputs and outputs than the ECU offers. Our Haltech CAN system article covers the network basics.
Troubleshooting
| Symptom | Usually |
|---|---|
| Nothing happens on the bench, outputs dead | Normal. USB puts the ECU in low-power mode with I/O disabled |
| Can't see the Wi-Fi network | Ignition off (Wi-Fi needs main power), module not enabled, or settings not applied |
| MAP reads atmospheric at idle | Vacuum hose not connected, split, or on a port that doesn't see manifold vacuum |
| Timing looks wrong while cranking only | The DFI module fires the coils during cranking. Check timing once the engine is running |
| Accessories drop out or fuse issues | Too much load on the shared 8 A switched 12V supply |
FAQ
Will it run my drive-by-wire or coil-on-plug conversion?
No. This unit supports cable throttle and distributor or DFI ignition only. A wire-in Nexus is the better fit for those builds.
Can I use it on a turbo Commodore?
Yes. The 4-bar internal MAP sensor covers moderate boost, and boost control can be set up on the auxiliary connector outputs.
Where are the other plug-in options?
Browse the Nexus range, or compare with the Skyline GT-R and Honda EP3/DC5 plug-ins. Not sure which fits? Book a free 30-minute consultation.