What the Rebel JZ actually is
Most standalone installs start with a universal ECU and a pile of flying leads. The Rebel JZ skips that. It's a Nexus ECU built specifically around Toyota's JZ family, and it pairs with a terminated harness that already has the right plugs for the engine. On top of engine control, the one unit also handles the wideband O2 sensor, logs data internally and talks to your laptop or phone over Wi-Fi, so you don't need a separate wideband controller or logger.
It covers six engines:
- 1JZ-GTE, both non-VVT-i and VVT-i
- 1JZ-GE VVT-i
- 2JZ-GTE, both non-VVT-i and VVT-i
- 2JZ-GE VVT-i
If you're weighing it against a universal Nexus, our Nexus S3 and S2 and Nexus T1 and T2 write-ups cover the alternatives, and the Rebel LS is the same idea for GM V8s.
What comes in the HT-220205 kit
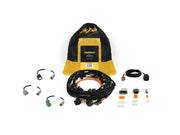
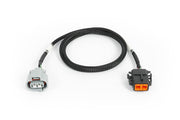
The full kit is built around the Rebel JZ ECU (HT-220002) and the main terminated harness (HT-186400). The smaller sub-harnesses are what let one main harness suit different engines and parts:
| Part | Why it's there |
|---|---|
| HT-186120, HT-186121, HT-186122 | Alternator adapters for Denso, Bosch and Tundra alternators |
| HT-187005 R154 transmission harness | Plugs the R154 manual gearbox into the transmission breakout |
| HT-186160 cable throttle sub-harness | Factory TPS and idle valve on a cable throttle engine |
| HT-186004 EV1 injector harness | Primary injectors with the EV1 (Minitimer) style plug |
| HT-186063 R35 coil harness | Direct-fire ignition on R35 coil-on-plug coils |
| Sensors and hardware | Bosch LSU 4.9 with weld-in bung, air temp sensor with weld-on fitting, two Bosch knock sensors with stud adaptors, a 150 psi oil pressure sensor and its 1/8 BSPT to 1/8 NPT adapter |
Sold separately if your parts need them: the HT-186007 EV6 (USCAR) injector harness, the HT-186010 Denso-style injector harness and the HT-186162 Bosch drive-by-wire sub-harness.
Before you pick up a wrench
One feature changes the order we do things in. The Rebel JZ powers up from the USB cable alone, in a low power mode where every input and output is switched off. That means you can build and load the map on the bench, with the injectors, coils and outputs set correctly, before the ECU ever sees 12 volts in the car. Do it. Powering up with the wrong ignition or injector settings is the fastest way to hurt coils, injectors or the ECU.
The usual electrical cautions apply too: disconnect the battery while you wire, keep fuel lines and wiring off hot parts, check for fuel leaks and bare wires before first start, and never disconnect or charge the battery with the engine running, since the ECU can see unregulated voltage when you do.
Tools we'd have on hand: a laptop with NSP installed, wire strippers and crimpers, a 4 AWG lug crimper, a multimeter, cable ties, wrenches, and a 2 in (51 mm) hole saw if the harness is going through the firewall. You'll also need someone who can weld the O2 bung.
Planning the layout
Decide where the ECU lives first, because everything else follows from it. Behind the dash, in the glovebox, in a kick panel or in the engine bay can all work, as long as it's clear of heat and moving parts and the harness reaches every plug without being stretched or bunched up. Then:
- Run the harness into the engine bay through the supplied grommet, well away from the exhaust, with no tight bends.
- Plug in sensors, injectors, coils and outputs.
- Tie the harness down and sleeve any section near heat or sharp edges.
- Bolt the ECU down firmly so it can't move and chafe the wiring.
- Load or build the map in NSP, then move on to the first start.
Power, ignition and starter
The ECU has its own positive and negative battery studs, and both stay connected to the battery full time. Use 4 AWG cable (not included) with the supplied ring terminals and boots, and fuse the positive side with a 100 amp fuse.
The pink wire is the ignition input and it wakes the ECU up. Feed it from the main ignition circuit, not accessory. Accessory power drops out while cranking, which would switch the ECU off mid-start. The pink wire lives in the cabin spare I/O connector alongside the pedal adaptor.
Starter control is built in. A heavy output, driven by the AX25+ pin, can put up to 25 A into the starter solenoid through a plug that fits the solenoid directly. The ECU needs to know when you're asking it to crank, so a white wire on AVI 1 in the cabin connector goes to the start position of the key switch. If you run a CAN keypad, you can assign the start request to a button instead and free AVI 1 for something else.
The alternator gets switched 12 V from a DTM-2 plug. The three adapter harnesses include a 470 ohm resistor to excite the alternator, standing in for the old charge warning lamp.
Engine sensors
| Connection | What to know |
|---|---|
| Crank | Plugs into the factory crank sensor behind the crank pulley at the front of the engine, near the timing belt gear and alternator. |
| Cam, non-VVT-i | These engines have two cam sensors on the intake side of the head. CAM FRONT goes to the one in the middle of the engine, CAM REAR to the rear one. Use both for the quickest sync on start-up. One will still run it, just slower to sync. |
| Cam, VVT-i | Only one sensor, at the rear. Use CAM REAR and tuck CAM FRONT out of the way. |
| Wideband | Direct plug for the Bosch LSU 4.9 (HT-010718), which enables closed loop fuel and lean protection. |
| Knock | Two plugs for the included Bosch knock sensors, mounted in the factory locations on the supplied studs. Studs torque to 10 ft-lb (13.5 Nm), nuts to 20 ft-lb (27 Nm). |
| MAP | There's no airflow meter. Load comes from a 4-bar MAP sensor inside the ECU, good to 43 psi of boost. Run a vacuum line from a manifold port, or tee into the regulator's reference line. Above 43 psi, wire an external sensor to the engine bay spare connector. |
| Coolant and air temp | The factory 2-pin coolant sensor plugs straight in. Air temp uses a Haltech HT-010206 sensor in the intake pipe, ideally just ahead of the throttle body, since the original sensor lived in the airflow meter you're removing. |
| Temp gauge sender | The single-pin gauge sender isn't read by the ECU. Its wire is passed through to pin 18 of the cabin connector for an analog gauge. |
| Oil and fuel pressure | Delphi 3-pin plugs for Haltech pressure sensors such as the 150 psi TI sensor. Not required to run, but we fit both on every build for fuel compensation and protection. |
| Flex fuel | Optional plug for the Haltech flex sensor if you want the tune to follow ethanol content. |
Weld the bung (battery disconnected) after the collector, where the sensor sees all cylinders, and ahead of any cat or air injection. Mount it on the top half of the pipe, tilted, so condensation can't pool on the element, and keep the lead clear of the exhaust.
Injectors, coils and grounds
Injectors connect through a breakout plug on the main harness, so the injector sub-harness you buy (EV1, EV6 or Denso style) just has to match your injector plugs. Every plug is labeled by cylinder. The Rebel JZ only drives high impedance injectors, so check yours before ordering.
Ignition works the same way through the R35 coil sub-harness. That setup does away with the factory igniter, and factory distributor or igniter-based systems aren't supported. The harness has a coil ground ring terminal that bolts to the head. That ground is for the coils only. The engine block still needs its own proper ground strap to the battery, because the harness doesn't carry engine ground.
Throttle, boost, cam control and transmission
- Throttle: use the HT-186160 sub-harness to keep the factory cable throttle, TPS and 6-pin idle valve, or the HT-186162 sub-harness for a Bosch drive-by-wire body. Toyota's ETCS-i electronic throttle isn't supported. Some engines, such as the 2JZ-GE, share the TPS plug but use different pins, so be ready to repin it.
- Pedal: drive-by-wire needs a pedal. The cabin connector has a DTM-6 for the pedal of your choice, and pin 21 takes a brake switch signal that should read 12 V with the brake pressed.
- Boost: a DTM-2 is ready for a solenoid. We use Haltech's 3-port solenoid for stable control. Note that twin-turbo setups aren't supported by this application.
- VVT-i: a plug for the cam solenoid at the front left of the engine, tuned with Cam Control in NSP.
- Transmission: a breakout connector takes the supported transmission harnesses, and the mating plug is included if you'd rather build your own.
Fan, fuel pump and spare I/O
Two heavy 10 AWG leads give you direct thermofan (red/orange) and fuel pump (red/yellow) power, so the ECU can prime the pump, kill it when there's no RPM, and run the fan on temperature, with the A/C, or switch it off above a set road speed if you have a speed sensor.
For extras, there's a 26-pin Superseal "Cabin" connector and a 12-pin DTM "Spare" connector in the engine bay, with both mating plugs in the kit:
| Type | Count | Good for |
|---|---|---|
| DPO | 5 | Ground-switching outputs up to 3 A: solenoids, shift lights, tachs, or relay coils for bigger loads |
| AVI | 3 | 0-5 V sensors and switches, with a selectable 1K pull-up for temp sensors and switch-to-ground inputs |
| SPI | 2 | Frequency or duty signals such as wheel speed, hall or reluctor, up to 25 V and 22.5 kHz |
There's a DTM-4 Haltech CAN plug at each end of the harness for dashes, keypads and PDMs, and a CAN hub if you run out of ports.
NSP, Wi-Fi and the setup wizard
Install NSP, plug the USB-C cable into the ECU, and it will come online in low power mode. The Rebel JZ wizard then walks you through naming the vehicle (which creates a folder for maps and logs), picking the exact JZ engine, the cam profile, NA or boosted and cable or DBW throttle, the MAP sensor, injectors, fuel regulator type and base pressure, and the coils. You get a summary to check before it builds the map.
For Wi-Fi, enable the module under Connections, set an SSID (at least 1 character) and password (at least 8), click Apply, then turn the key on and join that network from your laptop. Wi-Fi only works on main power. Two laptops can be on Wi-Fi plus one on USB at the same time, and the Haltech Connect phone app uses the same link for live data, gauges and clearing codes. See our Wi-Fi article for more.
First start checklist
- Confirm the battery is charged and the engine ground strap is fitted.
- With the key on, check every sensor reads sensibly in NSP.
- Cycle the key to prime the pump, then check fuel pressure and look for leaks.
- Crank briefly to make sure it turns over cleanly, then start it.
- Watch coolant temp and the wideband, and listen for anything odd.
The base map is meant to get it running, not to make power. It still needs a proper tune. If you'd like us to handle that, or check your plan before you start, book a free 30-minute consultation.
Rebel JZ FAQ
Can I keep my factory coils and igniter?
No. The Rebel JZ is set up for direct-fire R35 coils through the HT-186063 sub-harness. Factory igniter and distributor systems aren't supported.
Will it run my twin-turbo 2JZ-GTE?
Not as a twin. Twin-turbo systems aren't supported by the Rebel JZ application, so it needs to be a single-turbo setup.
Do I need an external MAP sensor?
Only if you'll run more than 43 psi of boost. Below that, the built-in 4-bar sensor covers it.