Why this connector trips people up
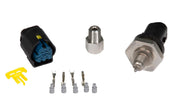
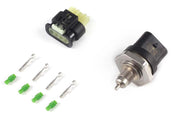
A Bosch fluid pressure and temperature sensor gives you two readings from one fitting, which saves a hole in the block and a second harness branch. Haltech sells them as the 145 psi version for lower-pressure fluids like oil and fuel, the 4000 psi version for high-pressure systems, and the plug and pins kit if you're building your own lead.
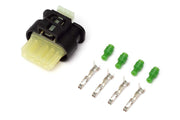
The catch is the connector. It has five cavities in two rows, and the terminals in the top row sit the opposite way round from those in the bottom row. Get that wrong and the pin either won't lock or gets forced in and damaged. There's also a blue secondary lock on the face of the connector that has to be in the right position for anything to go in or come out.
What you need
- A proper terminal crimper. We use the Haltech dual crimper set (HT-070300), the blue and red handled pair.
- The terminals and wire seals from the plug kit.
- A small, flat depinning tool for removal.
- A pick or tiny flat screwdriver to seat the wire seals.
Know the layout
Look at the back of the housing and you'll see the cavity numbers molded in:
| Row | Cavities | Terminal lock tang faces |
|---|---|---|
| Upper (two holes) | 1 and 2 | Outward, away from the connector body |
| Lower (three holes) | 3, 4 and 5 | The opposite direction to the upper row |
Which pin is pressure signal, temperature signal, 5 V and ground depends on the sensor, so take the pinout from the sensor's own documentation or ask us. Don't assume it matches another sensor you've wired before.
Pinning the connector
- Seal first. Slide the wire seal onto the wire before you crimp. It can't go on afterward, and it's easy to forget.
- Crimp properly. Strip only enough insulation for the conductor crimp, then crimp both the conductor and the insulation/seal tabs. A good crimp is symmetrical, tight and doesn't pull out with a firm tug. Our crimping guide shows what good and bad crimps look like.
- Note the lock tang. Before inserting, look at which side the terminal's locking tang is on, and turn it to suit the row you're filling, as per the table above.
- Open the secondary lock. Slide the blue lock on the front face to the side.
- Insert gently. Push the terminal in from the back. It should click home with very little force. If it doesn't, stop. Pull it back out and check the crimp and which way the tang is facing. Forcing it is how terminals get bent.
- Tug test. Give each wire a light pull. It shouldn't move.
- Seat the seals. Once every terminal is in, press the wire seals down into the back of the housing with a pick or small screwdriver until they sit flush.
- Close the lock. Slide the blue lock back to the center position. It's there to hold the terminals in place, so don't leave it open.
Depinning the connector
- Slide the blue secondary lock to the side.
- Find the small access hole just above or below the cavity of the pin you want to remove.
- Insert a small, flat depinning tool into that hole to lift the terminal's lock tang.
- Gently draw the wire out from the back.
Push the wire forward a little, then pull back again while holding the tool in place. Pushing takes the load off the tang so the tool can release it. This job needs almost no force when it's done right. If you're pulling hard, the tang isn't released, and you'll stretch the wire or tear the seal.
Common mistakes
| Problem | Usually |
|---|---|
| Terminal won't click in | Lock tang facing the wrong way for that row, the blue lock is still in the center, or the crimp is too bulky |
| Terminal clicks in but pushes out when mated | Tang flattened by an earlier forced attempt; replace the terminal |
| Blue lock won't slide closed | One terminal isn't fully seated |
| Intermittent reading after rewiring | A poor crimp, or the wire seal missing so moisture gets in |
After it's wired
Plug the sensor in and check both channels in the software before you fire the engine. With the engine off, pressure should show the resting value you expect with nothing pressurized, and temperature should roughly match the air around it. If one channel is fine and the other isn't, two pins are probably swapped. If you're setting up oil pressure protection with it, see oil pressure sensors and engine protection, and for general harness practice, Dave's step-by-step wiring guide.
Stuck on a connector? Get in touch with us and we'll talk you through it.