What Vehicle Dynamics measures
Vehicle Dynamics is NSP's name for how the car itself is moving, rather than what the engine is doing. It covers two families of channels:
- G-force (acceleration) on three axes: Lateral (cornering), Longitudinal (accelerating and braking) and Vertical (bumps, crests and compressions).
- Angular rate (how fast the car is rotating) on three axes: Pitch (nose up or down), Roll (body lean) and Yaw (rotating around a vertical axis, as the car turns or slides).
These channels are gold in a data log. Lateral G tells you how hard a driver is really using the tires in a corner, longitudinal G shows braking and launch performance, and yaw rate can reveal a car that's rotating more than the steering asked for. They can also feed tuning strategies and chassis setup decisions.
Where the data comes from
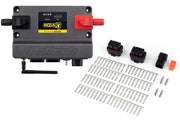
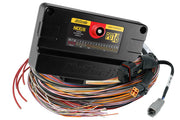
The Nexus R5 accepts up to three G-force and three angular rate inputs, and each one can come from a different source:
| Source | How it connects | When we use it |
|---|---|---|
| Internal IMU | Built into most Nexus ECUs; channels are assigned automatically | Almost every install. No extra hardware |
| External accelerometer | Wired to any spare analog voltage input (AVI) | When the ECU can't be mounted flat and solid, or you want the sensor at the car's center of mass |
| Vehicle CAN | Read from the factory bus when the selected vehicle supports it | Late-model cars whose stability control module already broadcasts this data |
The IMU (inertial measurement unit) inside the ECU senses motion in several directions and turns it into NSP channels. It's very sensitive, which is great for detail and less great for noise. Expect to spend a little time on mounting and filtering to get smooth results.
Setting it up in NSP
- Mount the ECU first. Put it where it's going to live, bolted down solidly. The IMU measures the ECU's motion, so a loose or rubber-mounted ECU will add its own wobble to every channel.
- Enable the channels you want. On the main Vehicle Dynamics node, tick the G-force axes and angular rate axes you plan to use.
- Pick the input type. In the Wiring node, choose Inertial Measurement Unit (IMU) for the internal sensor, which is the right answer for most Nexus installs. Choose Analogue - Voltage for an external sensor, or CAN Input for factory bus data.
- Calibrate. For the internal IMU, run the calibration (below). For an external sensor, fill in each input's calibration table.
- Tune the filters. Drive, log and adjust until the channels are smooth but still responsive.
Calibrating the internal IMU
This step isn't optional. The IMU channels are only as good as the calibration, and the IMU can't be used until it's done. Click Calibrate... on the Vehicle Dynamics node and work through the on-screen steps exactly as written, paying close attention to what each step says about the car sitting level. Park on the flattest surface you can find before you start.
Calibration teaches the ECU which way is forward, sideways and up based on how it's mounted. If you relocate or rotate the ECU, even to tidy up a wiring loom, those references are wrong and the calibration needs to be redone.
Using an external accelerometer
When an input is set to Analogue - Voltage, an extra calibration node appears for it. That table converts the sensor's output voltage into G or degrees per second. If your sensor's manufacturer provides a calibration file, use Load from File to bring it in, and Save to File to keep a copy for other cars. These calibration nodes don't appear for the internal IMU because it doesn't need one.
Analog inputs also get diagnostics. You can set minimum and maximum voltage DTCs for each input, with a severity level for each. A reading stuck near 0 V or the supply voltage almost always means a broken wire or a failed sensor, so these are worth enabling. They're only available with analog inputs.
Filtering: getting usable numbers
There's a separate filter for the G-force channels and one for the angular rate channels. Because the IMU picks up every vibration, a small filter value leaves you with a trace that jumps around so fast it's useless. A larger value smooths it into something you can read. There's no universal right number: every car's engine vibration, mounts and chassis stiffness are different, so it takes some trial and error.
Our starting approach is to begin with a generous filter, log a drive with some cornering and braking, and then back the filter off step by step until you start to see noise creep in. You want a trace that follows real events like a corner entry or a hard stop without jittering in between.
Troubleshooting
| Symptom | Usually |
|---|---|
| Channels are jumpy or noisy | Filter too small, or the ECU isn't mounted solidly |
| Lateral G shows up as longitudinal (axes swapped) | ECU moved or rotated after calibration; recalibrate |
| Reads G while parked | Calibration done on a slope, or not completed |
| External sensor reads nothing | Wrong AVI selected, missing calibration, or a wiring fault (check the voltage DTCs) |
| CAN option gives no data | The selected vehicle doesn't broadcast dynamics data on its CAN bus |
Vehicle Dynamics sits alongside the other sensor setups in NSP, like manifold pressure and barometric pressure. If you're choosing an ECU, the Nexus R5 supports the full set of inputs covered here.
Vehicle Dynamics FAQ
Does my Nexus ECU have an IMU?
Most Nexus models do. Check the specifications for your model, or ask us and we'll confirm it for you.
Where should I mount the ECU for the best G-force data?
Somewhere solid, flat and away from strong engine vibration, as close to the middle of the car as practical. Then calibrate it in that final position.
What filter value should I use?
There isn't one number that suits every car. Start high, then reduce it until the trace is responsive without jitter. If you want a second opinion on your logs, book a free consultation.