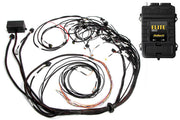
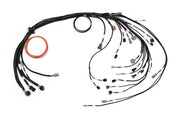
Which Barra engines this harness suits
The Nexus R3 Ford Barra terminated harness (HT-186405) is built for engine conversions that pair an inline-six Barra with a Nexus R3 VCU. It covers three generations:
- BA series: the Barra 240T turbo engine from the XR6T.
- BF series: the naturally aspirated Barra 190 found in Falcons and the Territory, plus the 245T turbo XR6T engine.
- FG series: the 270T turbo XR6T engine.
The harness plugs straight into the R3 and ends in factory-style connectors at the engine, so most of the job is routing and plugging in rather than pinning. What you still need to decide is which injector and ignition sub-harnesses suit your build, and how you want to handle the cabin side (key switch, starter signal, brake switch and pedal).
What comes in the kit, and what you buy separately
Every kit includes adaptors for both the early and late Barra variants, so one part number covers BA, BF and FG. The pieces you choose yourself are the ones that depend on your injectors and coils.
| Part | Included? | You need it when |
|---|---|---|
| Barra terminated harness (HT-186405) | Yes | Always |
| APP pedal adaptors: BA/BF (HT-186131) and FG (HT-186132) | Yes | Running the factory Ford accelerator pedal |
| Throttle body adaptors: BA/BF (HT-186165) and FG (HT-186166) | Yes | Running the factory electronic throttle |
| Alternator adaptors: 2-pin BA (HT-186125) and 3-pin BF/FG (HT-186127) | Yes | Keeping the factory alternator |
| Cabin adaptor harness (HT-186130) | Yes | Always, for the in-cabin connections |
| Mating connectors and pins for boost solenoid, spare I/O and transmission breakout | Yes | Wiring those optional circuits |
| Injector sub-harness: Denso/Sumitomo (HT-186010), EV1 (HT-186004) or EV6/USCAR (HT-186007) | No | Always. Pick the one that matches your injector plugs |
| Ignition sub-harness: BA/BF (HT-130345) or FG (HT-130347) | No | Keeping the factory coils |
| 6-cylinder igniter adaptor (HT-186069) and High Power Igniter (HT-020036) | No | Keeping the factory coils (mandatory, see below) |
Before you power anything up
Nexus units talk to NSP over the USB cable with no 12V applied. Use that. Set up your ignition outputs, injector outputs and every other driven output on the bench before the harness ever sees battery power. Powering the VCU with the wrong output configuration can hurt the engine, the coils or the VCU itself.
- The harness does not ground the engine. Run a proper ground strap from the block to the battery.
- Disconnect the battery while you work, keep fuel system parts and wiring clear of heat (shield them where needed), and don't work with sparks or tools near fuel vapor.
- When you're done, look for fuel leaks and for any bare or unprotected wire before the first key-on.
- Never charge the battery or pull a battery cable with the engine running. The VCU can see an unregulated voltage spike and fail.
Power, key switch and starting
Main power
The R3 takes its power directly from the battery through two Surlok terminals, and both must stay connected at all times. Connect the red terminal to battery positive and the black terminal to battery negative using 4 AWG cable (not included). Haltech recommends a 150A fuse in the positive lead. The red and black Surlok connectors are also available separately if you need spares.
Ignition switch input
The pink wire is what wakes the VCU up, and it needs switched +12V from the key. Tap the main ignition circuit, not accessory. Accessory circuits usually drop out while the key is held in Start, which would switch the VCU off mid-crank. The pink wire leaves the harness at the cabin spare I/O connector, the same area as the pedal adaptor. Our ignition switch article covers this input in more detail.
Starter control
The VCU can run the starter itself. A heavy output wire with a spade terminal plugs onto the starter solenoid and can supply up to 25A at +12V. It is driven by HCO 25A 1, which you assign to the starter function in NSP. The VCU also needs to know when the driver is asking to crank, so a white wire in the cabin connector (AVI 1, pin 8) goes to the start signal from the key switch. If you'd rather use a different input, the start request can be assigned to any free AVI or SPI, or to a button on a CAN keypad.
Alternator
A 2-pin DTM connector provides switched +12V for the alternator, and there's a DPO available if you want the VCU to control charging. The kit's adaptors suit the common Barra alternators: HT-186125 for the 2-pin BA unit and HT-186127 for the 3-pin BF/FG unit.
Sensors on the engine
- Crank and cams: the crank sensor sits at the front, behind the pulley, and the two cam sensors are at the back of the head, one per side. All three use factory plugs on labeled branches. Each branch also hides a switched 12V and sensor ground under the heat shrink, ready if you convert to Hall effect sensors later.
- Knock: two factory knock sensor plugs reach the sensors on the side of the block under the intake, so the VCU's knock control strategy can use both.
- TMAP: the Barra combines manifold pressure and air temperature in one 4-pin sensor. The harness brings this out as a flying lead that you terminate yourself, using whichever of the two supplied connector sets matches your engine (BA/BF or FG).
- Coolant (head temperature): Ford's sensor lives at the back of the head near the firewall and reads head temperature without sitting in coolant. It uses the factory plug and is set up in NSP just like a normal coolant sensor.
- Oil and fuel pressure: Delphi 3-pin plugs suit Haltech pressure sensors. They're optional for running, but we fit them on every build because they let the VCU protect the engine and correct fueling.
- Wideband: a DTM-6 plug connects a Haltech wideband pack, either Bosch LSU 4.9 (HT-010746) or NTK (HT-010747), run by the R3's built-in controller. That unlocks closed loop fueling and lean protection.
- Flex fuel: an optional plug suits the Haltech flex fuel sensor so the tune can adapt to ethanol content on the fly.
Factory Barra coils are 2-pin "dumb" coils with no igniter inside. If you keep them, the Haltech High Power Igniter (HPI) and the 6-cylinder igniter adaptor must sit between the harness's coil breakout and the Barra ignition sub-harness. Plugging the factory coils straight into the breakout will damage the coils and the VCU. The alternative is Haltech's R35 coil bracket kit (HT-120205), which plugs directly into the breakout and needs no external igniter.
Barra cam timing reads differently in NSP
Both cams on the Barra are continuously variable, with up to 60 degrees of travel. Two details catch people out:
- The intake cam rests fully advanced. Adding solenoid duty retards it. The result is an intake target table that looks like an ordinary table shifted 60 degrees toward retard. That's normal for this engine, not a mistake. The exhaust cam behaves the way most engines do.
- Ford's zero isn't Haltech's zero. What Ford calls 0 degrees is roughly 10 degrees of retard in Haltech terms. So cam numbers copied from another Barra tuning platform won't mean the same thing here.
Our advice: build your cam targets from what you measure and log on this setup, not from a table borrowed from another ECU. The cam control article explains the NSP side.
Fuel, throttle and cabin connections
- Injectors: a single breakout accepts whichever injector sub-harness you bought, and every injector plug is labeled by cylinder.
- Drive by wire: the kit's BA/BF and FG throttle adaptors plug into the throttle breakout, and the matching pedal adaptors plug into the 6-pin DTM labeled APP on the 26-pin cabin connector. Pin 21 of that connector is reserved for a brake switch, which should read +12V when the pedal is pressed. See drive by wire for setup.
- Dual intake runners: a 2-pin DTM drives the runner solenoid on engines that have one.
- Boost: a 2-pin DTM suits a boost solenoid. We use the 3-port HT-020400 on performance builds for steadier control.
- Thermofan and fuel pump: 10 AWG feeds (red/orange for the fan, red/yellow for the pump) let the VCU power them directly. That gives you fan temperature thresholds, A/C fan requests and a speed-based fan cutoff (with a speed sensor), plus pump priming and automatic pump shutoff when there's no engine speed.
- A/C: factory plugs reach the compressor clutch and pressure switch, so the VCU can delay the compressor after startup, drop it at high rpm and only engage it when system pressure is in range.
- Transmission: a breakout with a supplied mating connector lets you wire transmission sensors or connect a CAN-based Haltech transmission controller.
- CAN: DTM-4 CAN plugs at both the cabin and engine ends take dashes, keypads and PDMs. Add a CAN hub if you run out of ports.
- Spare I/O: the 26-pin "Cabin" connector and a 12-pin DTM "Spare" connector in the engine bay give you extra inputs and outputs for switches, relays, lights and sensors. Both mating connectors are in the kit.
Need this diagram? Ask us and we'll send it over with advice for your build.
Troubleshooting
| Symptom | Usually |
|---|---|
| VCU drops out while cranking | Pink wire tapped from an accessory circuit instead of main ignition |
| Starter won't engage from the key | White start-signal wire not connected, or HCO 25A 1 not assigned to the starter function |
| No spark or damaged factory coils | Factory coils connected without the HPI and igniter adaptor |
| Intake cam table looks "backward" | Normal for the Barra: the intake rests fully advanced and retards with duty |
| Cam angles don't match another platform's tune | Ford's zero reference is about 10 degrees different from Haltech's |
FAQ
Does one harness cover BA, BF and FG Barras?
Yes. The kit ships with pedal, throttle and alternator adaptors for both the BA/BF and FG variants. Only the injector and ignition sub-harnesses are bought to suit your engine.
Can I use the factory Barra coils?
Yes, but only with the HPI igniter and 6-cylinder igniter adaptor in between. Or skip the igniter entirely with the R35 coil kit.
Is there a version for the Nissan RB?
Yes, see the Nexus R3 RB harness guide. For a Barra swap plan, book a free consult with us.