One solenoid or two?
The Output Type option sets the style of system you are running.
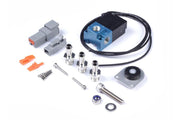
- One Solenoid: what almost everyone runs. Factory turbo cars and most aftermarket turbo kits use a single solenoid in the wastegate reference line. Haltech's 3-port solenoid and 4-port solenoid both suit this.
- Two Solenoids: used when a pressurized gas, usually CO2, drives the wastegate. CO2 is popular because it isn't flammable, and a regulated bottle gives very consistent pressure, which is why this layout shows up mostly on drag cars. One solenoid feeds pressure in and the other vents it.
CO2 plumbing
On a two-solenoid setup, use each solenoid's Normally Closed (NC) and Common (C) ports and block the Normally Open (NO) port completely. A leak at the NO port means the system can't hold pressure. Haltech's CO2 dual solenoid kit is built for this, and our CO2 boost control wiring page has more detail.
Pin assignments
| Connection | What it's for | Usual input or output type |
|---|---|---|
| Boost Solenoid Output | Drives the solenoid with a pulsed signal | A DPO (digital pulsed output) |
| Arm Switch | Turns boost control on or off. With it off, you run on wastegate spring pressure | Usually an AVI (analog voltage input) |
| Boost Trim Input | A variable voltage from a dial that lets the driver pull boost back | An AVI, since the signal varies |
| Scramble Boost Input | A button for a timed boost increase | An SPI (synchronized pulsed input) or an AVI configured as a switch |
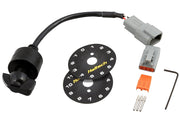
The trim input pairs well with the 12-position rotary trim module, which gives the driver a clean, repeatable set of boost steps.
Our checklist before the first boost run
- With the engine off, command the output in NSP and listen for the solenoid clicking.
- Confirm the solenoid frequency in the main boost settings matches the solenoid you bought.
- Check the arm, trim and scramble channels change as you move each switch or dial.
- Double-check the hose routing against the solenoid's port labels. Hoses on the wrong ports are one of the most common reasons boost control seems to do nothing.
Where to go next
Once it is wired, set up the control strategy in boost control, then tune the closed loop base duty cycle and target pressure tables.