What's on this connector
The Elite 2500 splits its I/O across a 26-pin and a 34-pin main connector. The 26-pin side holds the crank and cam inputs, four SPIs, several analog inputs, both knock channels, the CAN bus, two ignition outputs, one DPO and the two drive-by-wire outputs. In other words, it's the plug where wiring quality matters most, because trigger, knock and CAN signals are the easiest to corrupt with noise.
"SHD" in the color column means that circuit is run in shielded cable in Haltech's harness. If you're building your own loom, keep those circuits shielded too, and ground the shield at the ECU end only.
26-pin pinout
| Pin | Function | Wire color | What to know |
|---|---|---|---|
| 1 | Crank (Trigger) + | Yellow, shielded | Works with digital (Hall/optical) or reluctor crank sensors |
| 2 | Cam (Home) + | Yellow, shielded | Works with digital or reluctor cam sensors |
| 3 | AVI 7 (Air Temp) | Gray | Analog 0-5V; 1k pull-up can be switched on in software |
| 4 | AVI 8 (Coolant Temp) | Violet | Analog 0-5V; 1k pull-up can be switched on in software |
| 5 | Crank (Trigger) - | Green, shielded | Ground reference, used with reluctor crank sensors |
| 6 | Cam (Home) - | Green, shielded | Ground reference, used with reluctor cam sensors |
| 7 | SPI 4 | Gray/Red, shielded | Up to 50 kHz, no more than 25V DC on the input |
| 8 | SPI 1 | Gray, shielded | Up to 50 kHz, no more than 25V DC on the input |
| 9 | SPI 2 | Gray/Black, shielded | Up to 50 kHz, no more than 25V DC on the input |
| 10 | SPI 3 | Gray/Brown, shielded | Up to 50 kHz, no more than 25V DC on the input |
| 11 | +13.8V ECU supply | Red/White | 12V power input to the ECU |
| 12 | AVI 6 (O2 Input 1) | Gray/Orange, shielded | Analog 0-5V; suits a narrowband O2 sensor |
| 13 | AVI 1 (O2 Input 2) | Gray/Yellow, shielded | Analog 0-5V; suits a narrowband O2 sensor |
| 14 | Signal ground | Black/White | Sensor ground reference |
| 15 | Signal ground | Black/White | Sensor ground reference |
| 16 | Signal ground | Black/White | Sensor ground reference |
| 17 | IGN 7 | Yellow/Violet | Ignition output, 1A maximum |
| 18 | IGN 8 | Yellow/Gray | Ignition output, 1A maximum |
| 19 | DPO 4 | Violet/Orange | Switches to ground, 1A maximum, with a fixed 12V pull-up |
| 20 | AVI 5 | Orange/Green | Analog 0-5V; 1k pull-up can be switched on in software |
| 21 | Knock 1 | Gray/Green | For piezoelectric knock sensors |
| 22 | Knock 2 | Gray/Blue | For piezoelectric knock sensors |
| 23 | CAN H | White | CAN high (ISO 11898); can be set as the Haltech or vehicle bus |
| 24 | CAN L | Blue | CAN low (ISO 11898); can be set as the Haltech or vehicle bus |
| 25 | DBW 1 / DPO | Brown/Black | 5A peak, 1A average, up to 100 kHz |
| 26 | DBW 2 / DPO | Brown/Red | 5A peak, 1A average, up to 100 kHz |
Wiring notes from the shop
Trigger inputs (pins 1, 2, 5, 6)
With a reluctor sensor, positive goes to the + pin and negative to the matching - pin. With a Hall effect or optical sensor, only the + pin carries the signal; the sensor takes its ground from a signal ground and its supply from the ECU's sensor supply. Getting reluctor polarity backward is one of the most common causes of timing that drifts with rpm. Our Hall effect or reluctor guide explains the difference.
Analog inputs and pull-ups
AVI 7 and AVI 8 are the natural homes for your air and coolant temperature sensors. Those are two-wire thermistors, so turn the 1k pull-up on in ESP. Leave pull-ups off for any powered three-wire sensor, such as a pressure sensor. AVI 6 and AVI 1 can read narrowband O2 sensors directly.
Knock and CAN
Knock sensor signals are tiny, so route them away from ignition and injector wiring. For CAN, keep H and L twisted together along their whole length and make sure the bus is terminated correctly. This CAN pair can be assigned to either the Haltech expansion bus or the vehicle bus in software.
Drive-by-wire outputs
Pins 25 and 26 drive the throttle motor. They're high-current outputs, so use wire sized for the motor's draw and good crimps. If the throttle body isn't being used, these pins can serve as extra DPOs. For the full DBW hookup, see Elite 1500/2500 DBW wiring.
Pins 7 to 10 accept up to 25V DC, and the ignition and DPO outputs are rated at 1A. Driving a coil with no built-in igniter, or a relay coil that draws more than that, straight from these pins will damage the output. Use igniter-type coils and relays as needed.
Related pages
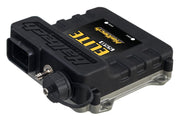
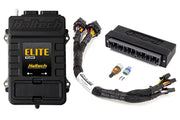
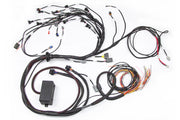
If you're working from a Haltech flying-lead harness, see the 26-pin Elite 2500 harness and 26-pin short harness pages. The Elite 2500 overview covers the ECU's full feature list. Need the Elite 2500 plug and pin set for a custom loom? We stock it.