What the CAN wideband controller does
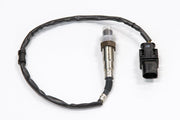
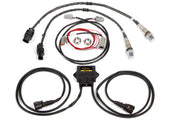
A wideband oxygen sensor tells you the real air/fuel mixture the engine is burning, from very rich to very lean. The sensor itself can't do that alone. It needs a controller to heat it to the right temperature, drive its pump cell and turn the result into a lambda number. Haltech's WB1 (one sensor) and WB2 (two sensors) controllers do that job and then send the reading to the ECU digitally over the Haltech CAN bus.
Because the value arrives as data rather than a 0-5 V signal, there's no ground offset or scaling error to chase. The ECU sees exactly what the controller measured, and you can log it, show it on a dash, or use it for closed-loop fuel control. The controllers work with Elite ECUs and with the older Platinum series.
Quick specs
| Item | WB1 | WB2 |
|---|---|---|
| Sensor | Bosch LSU 4.9 | |
| Operating voltage | 6.5 to 16 V | |
| Current, typical | 650 mA | 1.3 A |
| Current, peak (cold start) | 3 A | 6 A |
| Data link | CAN, 1 Mbit/s | |
| Connectors | Two built-in DTM-4 ports | |
| Max ambient temperature | 257°F (125°C) | |
| Case size | About 3.4 x 3.0 x 1.1 in (86 x 77 x 28 mm) | |
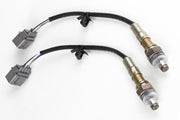
The number that matters most for installation is the peak current. A cold LSU 4.9 heater pulls hard for the first moments after key-on, up to 3 A per sensor. That's why the power wiring section below is not optional reading. We stock the WB1 kit, the WB2 kit and spare Bosch LSU 4.9 sensors. If you prefer NTK sensors, the WB2 NTK kit is the equivalent for those.
Mounting the controller
- Pick a flat, cool spot. The enclosure has two mounting holes. Keep it well away from the turbo, manifold and downpipe.
- Point the connectors so water drains away. The box is sealed, but a connector facing up can hold water in its cavity. Sideways or down is better.
- Plan the CAN run. The supplied DTM-4 to DTM-4 CAN cable plugs into either port on the controller and goes through a firewall grommet to the ECU or a CAN hub. The spare port is for the next device in the chain.
Powering it without hurting your ECU
The kit includes a DTM-4 power cable. It sits in line between the CAN cable and the controller, carries the CAN wires straight through, and adds a red and a black lead so you can feed the controller from the car rather than from the ECU's CAN port.
| DTM-4 pin | Wire | Job |
|---|---|---|
| 1 | Red (power cable) | Switched 12 V, fused, live with the key |
| 2 | Black (power cable) | Ground to battery/chassis |
| 3 | White | CAN High, passed through |
| 4 | Blue | CAN Low, passed through |
Where to take power, by ECU
| ECU / install type | CAN connection | 12 V and ground |
|---|---|---|
| Elite dual-connector (wire-in) | Either the DTM-4 CAN plug in the harness or the one in the ECU's top pocket, via the power cable | Fused key-on 12 V is available at harness pin A26 (red/blue); ground at A10 (black) |
| Elite single-connector | The CAN plug in the ECU harness, via the power cable | Same: A26 (red/blue) for power, A10 (black) for ground |
| Elite with a Plug 'n' Play adaptor | The CAN plug in the adaptor harness, via the power cable | Use a fused key-on source in the car. Do not take it from the patch loom, the wideband's draw can damage the patch box |
| Platinum Pro Plug-in | Power cable plus the DTM-4 to 8-pin Tyco CAN cable that came with the ECU | Fused key-on 12 V and ground from the vehicle harness; your ECU's quick start guide shows where |
| Platinum Sport | Power cable plus a DTM-4 to 8-pin Tyco CAN cable, which you'll need to order (HT-130040) | A26 (red/blue) for power, A10 (black) for ground on the Platinum Sport harness |
Two or more wideband controllers on the bus need their switched 12 V supplied through a relay. The combined cold-start draw is too much for an ECU harness pin. If you're not sure how to add one, our guide on how relays work covers it.
Adding other CAN devices
The two DTM-4 ports let you daisy-chain. A wideband can sit in a chain with other widebands, thermocouple amplifiers, I/O expanders, CAN gauges or a dash. On bigger builds we often use a 4-port CAN hub to keep the wiring tidy and make fault-finding easier.
Where the sensor goes
Placement decides how accurate and how long-lived the sensor is. Our rules:
- Distance. Aim for roughly 3 feet (about 1 meter) of pipe after the nearest exhaust valve on a naturally aspirated engine, or after the turbine outlet on a turbo car, measured along the pipe's center line. Too close and the sensor cooks; too far and the reading lags.
- Bung. The kit supplies a mild steel bung. Weld it in fully so there are no pinholes. An exhaust leak ahead of the sensor pulls in outside air and makes it read lean.
- Angle. Mount the sensor tip-down, above horizontal, so condensed water runs away from it instead of into it during warm-up.
- Wiring. The sensor plugs into the pre-terminated 6-pin lead on the controller. Route and tie it clear of hot parts.
On a WB2, each sensor lead is fixed to a channel, so label them before you install. Haltech's WB2 diagram shows which lead is sensor 1 and which is sensor 2. Ask us if you need it.
Bringing it online in ESP
- Power up with the controller connected and go online with ESP. The ECU detects the controller automatically and lists it under Devices.
- Enable it. Use the Options drop-down and choose Enable Device, or do it from the Devices page in Main Setup.
- Reset the ECU. The device status should change from Device Found to Online.
- In the Functions tab, enable the sensors and assign them as Wideband O2 sensor 1, 2 and so on.
- If you want the ECU to trim fuel from the reading, enable and set up O2 Control. Otherwise the channel is there for logging and display.
Two or more WB2s
Every controller leaves the factory as device ID A. If two controllers share an ID, both show an error. Depending on the ECU, up to four WB2s can be used. To set IDs:
- Connect only the controller you want to change and enable it as above.
- Open Options in the Devices tab and pick the change-ID option (for example, to
B). - Connect the next controller and repeat until every unit has its own ID.
- Reset the ECU, then assign the extra sensors as Wideband O2 3, 4 and so on in Functions.
If you've already plugged in two controllers with the same ID, unplug one first. You can't re-program while they're conflicting.
Reading the status messages
The Wideband O2 channels normally show lambda. When something isn't right, they show a status instead:
| Status | What it means | What we check |
|---|---|---|
| Sensor Cold | Still heating up | Normal for the first seconds after start. If it never clears, check supply voltage under load |
| Condensation Phase | Heater is on reduced power while water clears from a cold exhaust | Normal on a cold start. Hitting a hot sensor with water droplets can crack it, so this is protection, not a fault |
| Free Air | Sensor is seeing atmosphere | Expected with the sensor out of the pipe. In the car, look for a large exhaust leak |
| Heater Short Circuit | Fault in the heater circuit | Damaged sensor lead or a failed sensor |
| Controller Inactive | Heater controller isn't running properly | Power and ground to the controller, then the controller itself |
| Sensor Short Circuit | Short in the sensor or its wiring | Melted or pinched lead, then the sensor |
| Sensor Open Circuit | Controller can't see the sensor | Unplugged or broken lead; a connector not fully latched |
| Battery Voltage Low / High | Supply is outside what the controller can work with | Charging system, a weak battery, or a voltage drop in the power feed |
Common problems
| Symptom | Usually |
|---|---|
| Device never appears in ESP | No switched 12 V at the power cable, CAN High/Low swapped in a custom cable, or it's plugged into a port that isn't on the Haltech CAN bus |
| Reads lean at idle, fine under load | An exhaust leak ahead of the sensor pulling in outside air |
| Sensors keep dying | Mounted too close to the engine or turbo, or pointing up so condensation reaches the tip |
| Second WB2 shows an error | Both controllers are still on device ID A |
Wideband controller FAQ
Can I use the CAN wideband on a Nexus ECU?
This guide covers the Elite and Platinum wiring and the ESP setup. Nexus ECUs use NSP, where the steps and menus differ, so check the Nexus Wideband O2 article or ask us before you order.
Do I still need the narrowband sensors?
Not for tuning. Narrowbands only tell you rich or lean of stoichiometric. For the difference, see narrowband vs wideband sensors.
Why does my wideband need a relay?
One controller is fine on the ECU's switched supply. Two or more can draw several amps together while the sensors heat up, which is more than an ECU harness pin should carry.