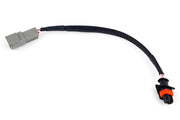
Many modern alternators, including a lot of GM LS units, let the engine computer set the charging voltage with a control signal instead of an internal regulator doing it on its own. On a Haltech Nexus, the Alternator Control function handles that, and this Wiring page decides which output sends the signal and how it behaves.
| Setting | What it does |
|---|---|
| Edit | Picks, or changes, the free output used as the Alternator Control Output |
| Clear | Removes the output assignment |
| Active State | How the output behaves when it's switched on. Low pulls the output to 0V. High pulls it up to the chosen pull-up voltage through a 4.7k ohm (4K7) resistor |
| Pull Up Voltage | The voltage the output is pulled up to on the selected output |
The right active state and pull-up depend on what your alternator expects to see on its control wire, so check the alternator's requirements before choosing. If the charging voltage won't respond at all, the first things we check are the output assignment and the active state, then the wiring to the alternator plug.
For LS swaps, Haltech's adapters make the connection simple: the small Bosch and large Yazaki LS harness adapters, or the Nexus Rebel LS 2-pin Bosch alternator harness. Once the output is set up, move on to the target voltage in AC target and the AC base table, both part of alternator control.