How to read this pinout
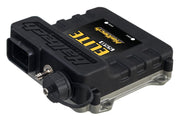
The Elite 2000 has two main connectors, a 34-pin and a 26-pin. This page covers the 34-pin plug. Rather than list the pins in numerical order, we've grouped them by function, which is how you'll actually wire an engine: power first, then injectors, then ignition, then the rest. Wire colors use Haltech's harness codes, with a slash for a stripe (so Y/B is yellow with a black stripe).
| Code | Color | Code | Color |
|---|---|---|---|
| B | Black | O | Orange |
| BR | Brown | P | Pink |
| G | Green | R | Red |
| L | Blue | V | Violet |
| W | White | Y | Yellow |
Power, grounds and sensor supplies
| Function | Pin | Wire | What to know |
|---|---|---|---|
| Battery ground | 10 | B | Run directly to the battery negative terminal |
| Battery ground | 11 | B | Also to battery negative; use both |
| 12V ignition input | 13 | P | Live with the key on and while cranking only |
| ECU injector power input | 26 | R/L | 12 V from the injector power relay. The ECU won't run without it. |
| +5V DC supply | 9 | O | Sensor supply, 100 mA maximum |
| +8V DC supply | 12 | O/W | Sensor supply, 100 mA maximum |
The injector power input isn't optional. If the ECU is dead on the laptop but everything else checks out, confirm the injector relay is feeding 12 V to pin 26.
Injector outputs
All eight injector drivers are current controlled, rated 0 to 8 A peak and 0 to 2 A hold, so they'll drive both high and low impedance injectors when set up correctly in the software.
| Output | Pin | Wire |
|---|---|---|
| INJ 1 | 19 | L |
| INJ 2 | 20 | L/B |
| INJ 3 | 21 | L/BR |
| INJ 4 | 22 | L/R |
| INJ 5 | 27 | L/O |
| INJ 6 | 28 | L/Y |
| INJ 7 | 29 | L/G |
| INJ 8 | 30 | L/V |
Ignition outputs
Six ignition outputs, each rated at 1 A. That suits coils with built-in igniters or an external igniter module; it's not enough to drive a bare coil primary directly.
| Output | Pin | Wire |
|---|---|---|
| IGN 1 | 3 | Y/B |
| IGN 2 | 4 | Y/R |
| IGN 3 | 5 | Y/O |
| IGN 4 | 6 | Y/G |
| IGN 5 | 7 | Y/BR |
| IGN 6 | 8 | Y/L |
Analog voltage inputs (AVIs)
Each of these reads a 0 to 5 V signal and has a 1k pull up you can switch on in software, which is what you want for two-wire temperature sensors.
| Input | Pin | Wire | Usual job |
|---|---|---|---|
| AVI 2 | 16 | O/B | Spare |
| AVI 3 | 17 | O/R | Spare |
| AVI 4 | 2 | O/Y | Spare |
| AVI 9 | 15 | Y | MAP sensor |
| AVI 10 | 14 | W | Throttle position sensor |
Digital pulsed outputs (DPOs)
These switch to ground at up to 1 A. What differs between them is the pull up, which matters if you're driving something that expects a voltage signal rather than a ground.
| Output | Pin | Wire | Pull up | Usual job |
|---|---|---|---|---|
| DPO 1 | 18 | V/B | User definable | Spare |
| DPO 2 | 1 | V/BR | Fixed to 5 V | Spare |
| DPO 3 | 23 | V/R | Fixed to 12 V | Spare |
| DPO 5 | 24 | B/Y | Fixed to 12 V | Fuel pump relay trigger |
| DPO 6 | 25 | B/R | Fixed to 12 V | ECR output |
Stepper outputs
Pins 31 to 34 drive a four-wire stepper idle motor. They're high and low side drivers that can source or sink 1 A, so if you aren't using a stepper motor they can double as extra DPOs.
| Output | Pin | Wire |
|---|---|---|
| Stepper 1 P1 / DPO | 31 | G |
| Stepper 1 P2 / DPO | 32 | G/B |
| Stepper 1 P3 / DPO | 33 | G/BR |
| Stepper 1 P4 / DPO | 34 | G/R |
Wiring tips from the shop
- Stay inside the 100 mA limits on the 5 V and 8 V supplies. They're meant for sensors, not accessories.
- Always drive fans, pumps and solenoids that draw more than 1 A through a relay.
- Check the 26-pin connector pinout for the rest of the ECU's connections, and the 34-pin wiring diagram for the full picture.
- The Elite 2000 overview explains what each input and output type can do.
Want a hand checking your harness before first power up? Book a free consultation.