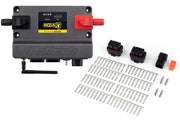
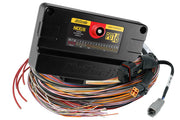
First decide what arms launch control
The Input Type setting tells the Nexus what has to happen, on top of the conditions in the Launch Control tab, before launch control can act.
| Input Type | How it arms | Good for |
|---|---|---|
| Always On | No switch needed; active whenever the Launch Control tab conditions are met | Dedicated drag cars where the other conditions already make it safe |
| Launch Switch | A dedicated switch wired to the Nexus | Street cars where you want a clear on/off control |
| Clutch Switch | Active while the clutch switch is engaged | Manual cars; set up the clutch switch function separately first |
| Trans-Brake Input | Active while the trans-brake input is on | Automatic drag cars; configure the trans-brake function separately first |
Clutch and trans-brake options reuse inputs you've already set up, so you don't need extra wiring. The launch switch option is the only one that needs its own input, covered below.
Choosing an input for the launch switch
Under Launch Control Switch Input, pick a spare pin. Either an SPI (synchronized pulsed input) or an AVI (analog voltage input) works. They're configured differently, so use whichever you have free and follow the matching section.
Setting up an SPI
An SPI treats the switch as a digital signal, so you tell it what "on" looks like electrically.
- Edge: choose
Fallingif the switch connects the input to ground when you press it. ChooseRisingif the switch feeds voltage to the input when you press it. - Sensor Type: always
Hall Effectfor a switch. - Pullup: turn it on when the switch only grounds the input. Without it, the pin floats when the switch is open and the ECU has no clean "off" voltage to read.
The most common setup we wire is a ground-switching button: Falling edge, Hall Effect, pullup enabled. It's simple, and it doesn't need a 12V feed run to the switch.
Setting up an AVI
An AVI reads a voltage, so you define two thresholds:
- Switch On Voltage: the point the input must cross for the switch to count as on.
- Switch Off Voltage: the point it must cross back over for the switch to count as off.
These can work in either direction, so they suit switches that pull low or push high. The trick is to leave a gap between the two, and to keep each threshold well away from the voltage the switch actually sits at. That margin soaks up voltage drop in the wiring, charging voltage changes and electrical noise, and stops the input chattering on and off.
Worked example: ground-switching button
Say the input reads about 5V with the button released (held up by a pullup) and drops to near 0V when you press it, because the button grounds it.
- Set Switch On Voltage near the bottom, around 1V. Below that, the ECU treats the button as pressed.
- Set Switch Off Voltage near the top, around 4V. Above that, it's released.
Anything between those two keeps the last state. Haltech's own examples use even tighter margins, 0.5V and 4.5V, which also work on a clean circuit. We lean toward a little more margin on long harness runs.
Worked example: voltage-supplying switch
Now flip it: the input sits low with the switch off and rises when the switch applies voltage. Here the On threshold goes above the resting voltage and the Off threshold below the on-voltage, with a clear gap between them. The ECU sees the rise past On as pressed, and the fall back past Off as released. Check the voltage the switch actually produces with the input's live reading in NSP before you settle on numbers.
With the engine off, watch the launch switch channel in NSP while you operate the switch several times. It should change state cleanly every time and never flicker. Then confirm in a log that launch control only arms when you expect it to.
Troubleshooting
| Symptom | Usually |
|---|---|
| Launch never arms | Wrong edge selected, pullup off on a ground-switching button, or the other Launch Control conditions aren't met |
| Launch arms on its own | Floating input (no pullup), or AVI thresholds too close to the resting voltage |
| Switch state flickers | No gap between the AVI on and off voltages, or a poor ground at the switch |
| Clutch or trans-brake option does nothing | That function hasn't been set up on its own yet |
FAQ
Should I use an SPI or an AVI for the launch switch?
Either works. SPIs are simple for a plain on/off button. AVIs are handy when you've run out of SPIs, or when the switch voltage isn't a clean ground or supply.
Can I use my clutch switch and a separate launch switch?
The Input Type setting chooses one source. Pick the one that matches how you want to drive the car.
Next steps: set the launch rpm, the launch ignition table and fuel correction, or start with the launch control overview. Tidy switch options include the dual switch panel kit.